So you’ve installed the calendar addon, created your first calendar, created your first event and now you’d like to collaborate with others.
So if you want your colleagues to see it – you need to give permission to do so.
In this tutorial you’ll learn:
- how to grant access to your calendar
- how to set up different permissions (read only, read+write access)
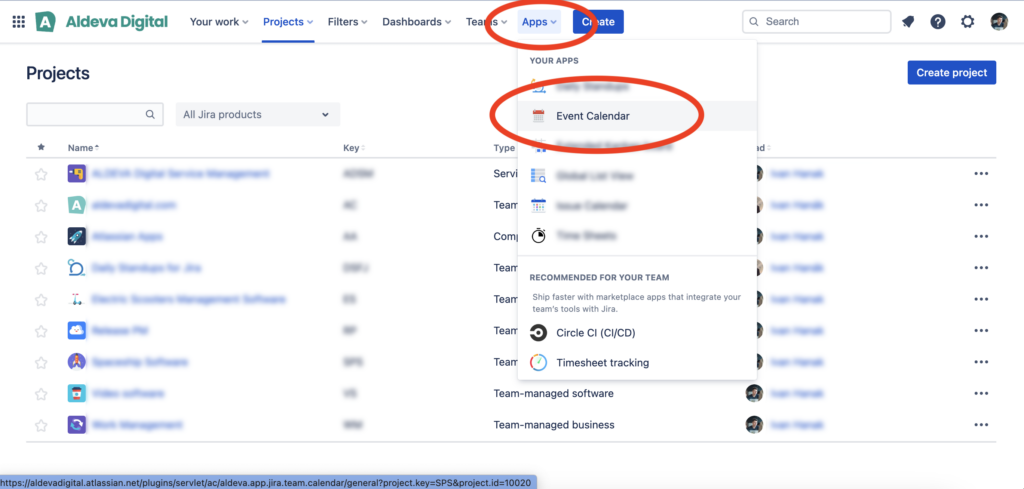
1. Open up Event Calendar application
From the top navigation panel select “Apps” -> “Event Calendar“

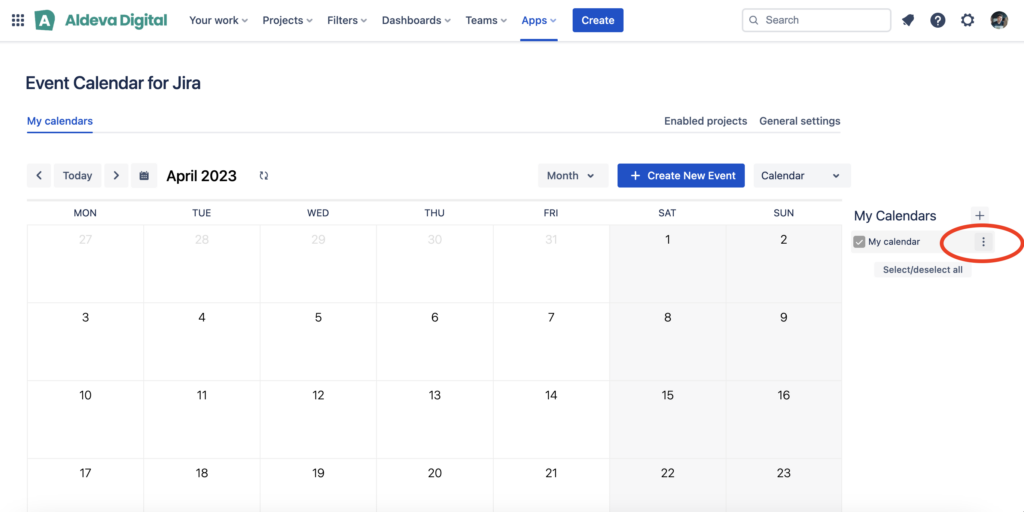
2. Find a calendar to share
Now, in the panel on the right side find your calendar in the list and click the “three dots” icon. It will open up calendar options.

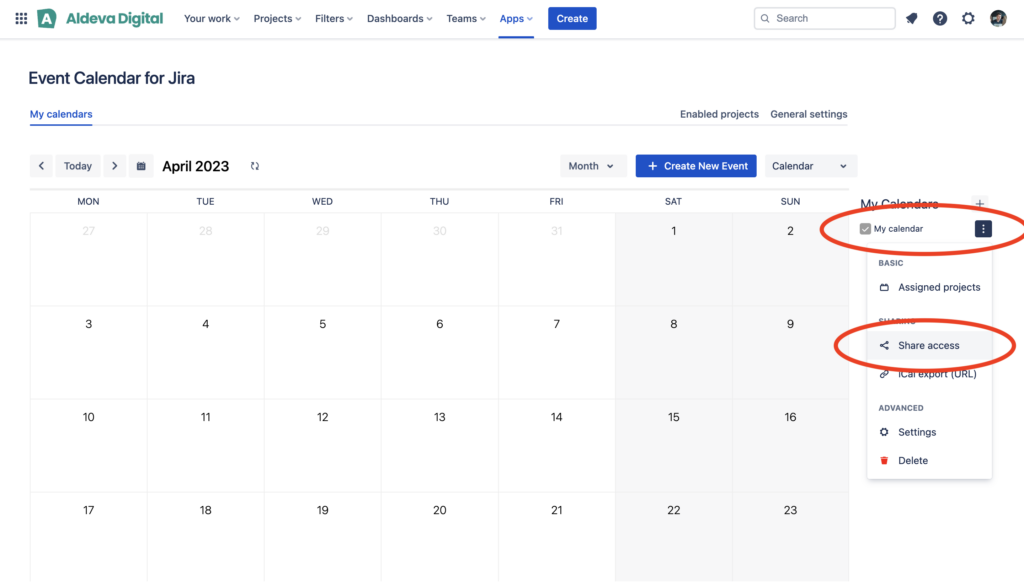
3. Open up “Share access” option
Now, click the “three dots” icon and calendar options will show up. From the options select “share access”

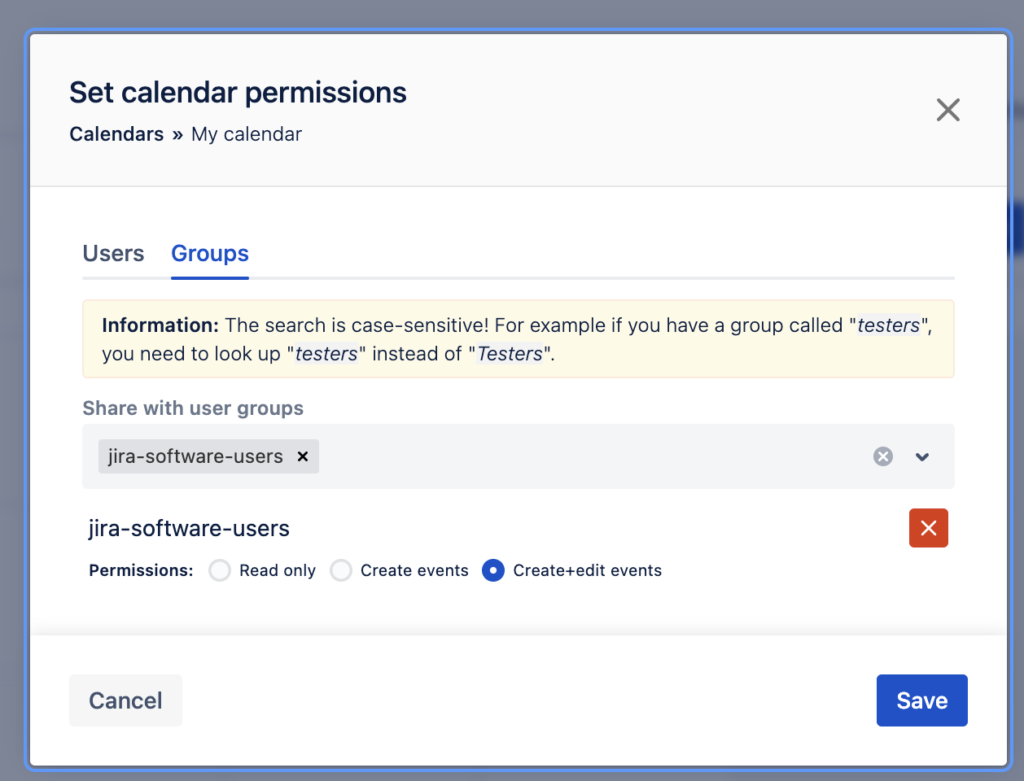
4. Configure permissions
Now in the context popup window you’ll be able to share the calendar either with individuals Jira users or whole Jira user groups.
Also, you can set the level of granted permissions:
- to allow only ead events
- to allow only creating events
- to allow only creating and editing events

