Keeping your Jira labels organized is essential for effective project management.
Over time, you may find that some labels are redundant or need to be consolidated. Simple Label Management for Jira offers a convenient way to merge multiple labels into one, streamlining your workflow. In this tutorial, we’ll guide you through the steps to merge labels using the plugin.
How to merge labels
- Install Simple Label Management for Jira from Atlassian Marketplace: https://marketplace.atlassian.com/1235196
- Open up the application from Jira top navigational menu. A list with available labels within your Jira will be show.
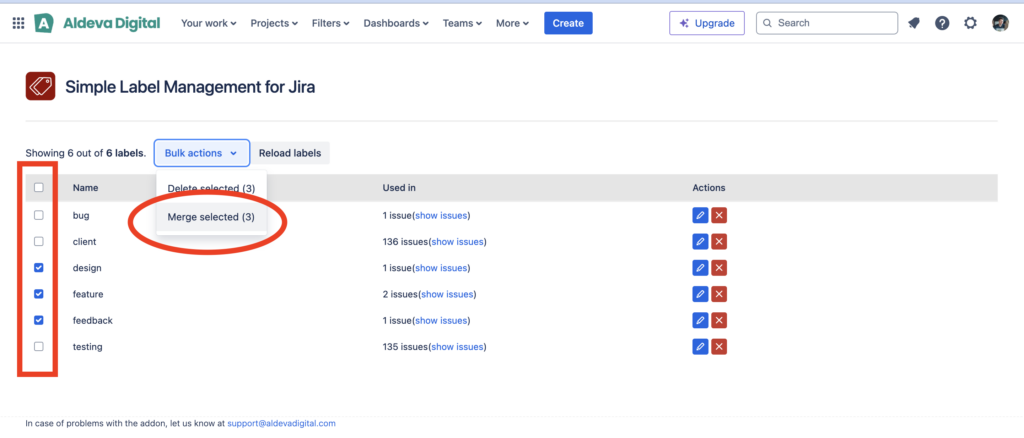
- Select the labels to merge – Within the table, locate the labels you want to merge and use the checkboxes next to each label to select the ones you wish to combine.
- Initiate the merge – After selecting the desired labels, click the Bulk Action button located above the table. From the dropdown menu, select Merge Labels.
- Simply confirm your selection and click Submit.
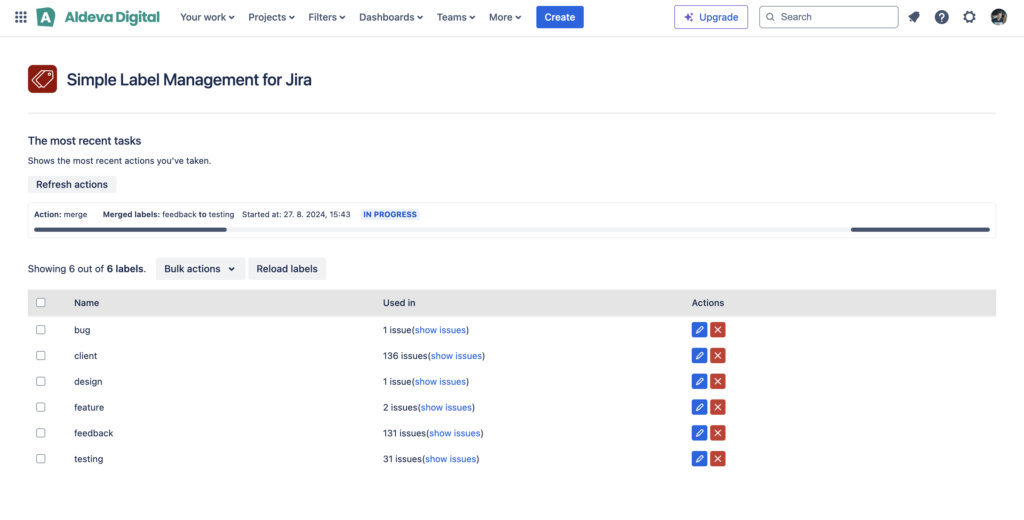
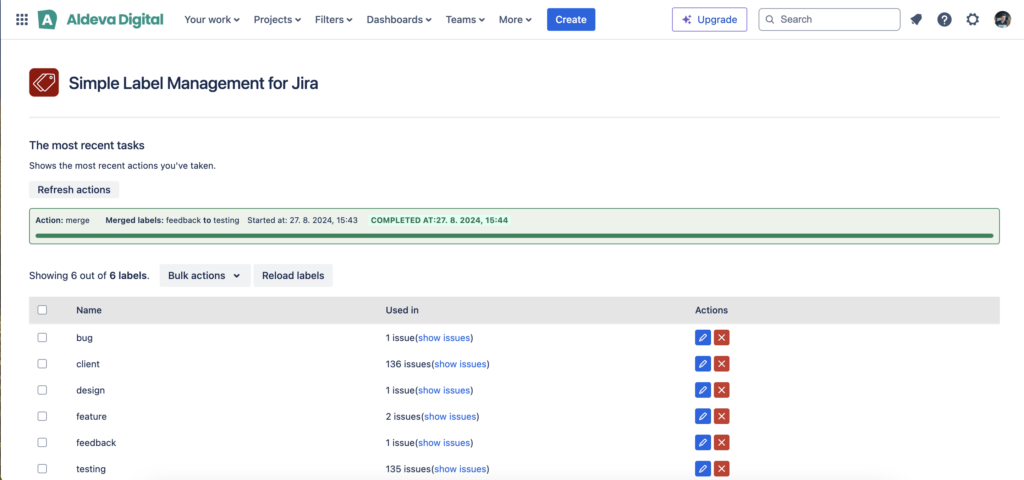
- After the modal window closes, check out the progress of task to see, if the renaming has completed

Performance information ⚠️
- the process of merging the labels can take a while; depending on the amount of issues that need to be processed. It has been estimated that Jira can process 10-20 issues / second, when conducting bulk action.
- in case you need to merge labels that have been assigned to around 1000 issues, it can take a while
- but don’t worry – you can simply follow the progress within the progress information bar at the top of the screen


Conclusion
Merging labels in Jira has never been easier, thanks to Simple Label Management for Jira.
By following the steps outlined above, you can quickly combine multiple labels into a single, more relevant label, helping to keep your projects organized and efficient. Additionally, the plugin offers features like renaming, deleting, and bulk actions, giving you full control over your label management in Jira.
