In this guide you’ll learn, how to get started with the plugin.
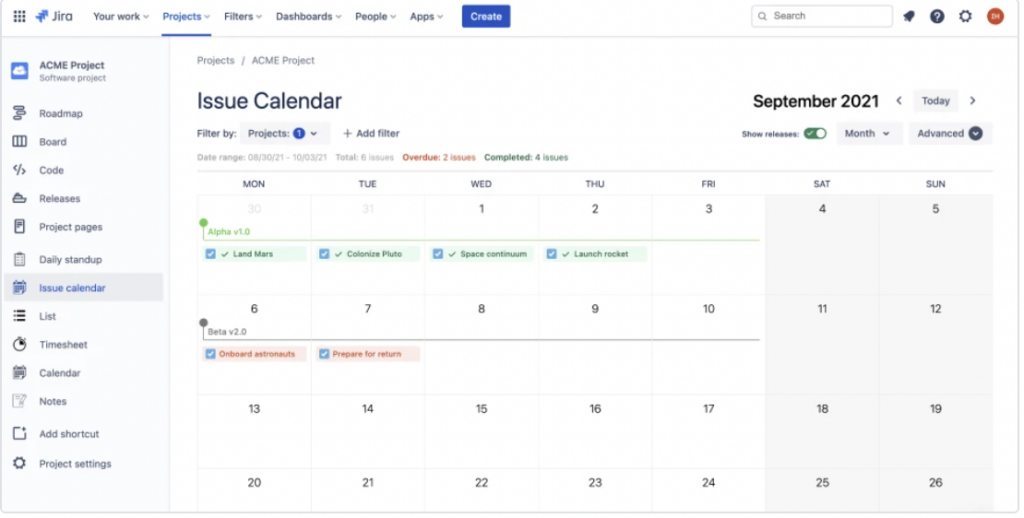
The main purpose of Issue Calendar for Jira is to visualize, plan and organize your sprints in an easy-to-use calendar.
It does that by displaying your issues in a calendar that supports all sorts of actions, for example drag&drop, creating, editing, deleting and filtering.
In this tutorial you’ll learn how to get started with the plugin, how to set it up and how to work with it. The tutorial is divided into 4 parts and you can skip to the one you need:
- Installing the plugin from Atlassian Marketplace
- Activating the plugin within your Jira instance
- Setting up the project calendar
- Setting up multiple-project calendar
Let’s do it 👊
1. Installing the plugin from Atlassian Marketplace
The very first step is looking up the application on Atlassian Marketplace. You can do it either directly from Marketplace search page or directly via this link: https://marketplace.atlassian.com/1225446.
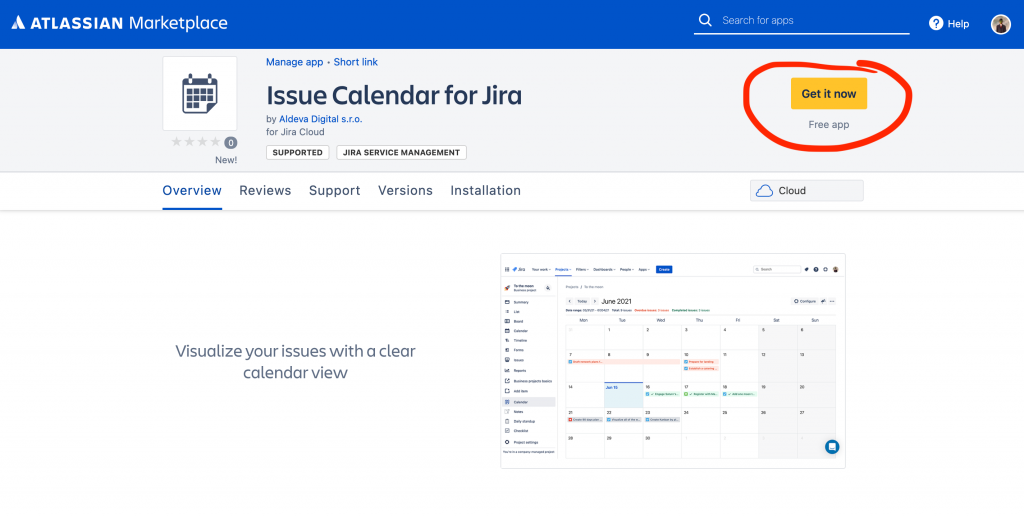
Once you click “Get it now” call to action button, you’ll be asked to select your Jira instance where to install the plugin.
Note: you need an admin permission to have this plugin installed. Otherwise you’ll receive an error message saying you are not permitted to do so. In this case you are advised to approach your Jira administrator with a request to evaluate this plugin.
2. Activating the plugin within your Jira instance
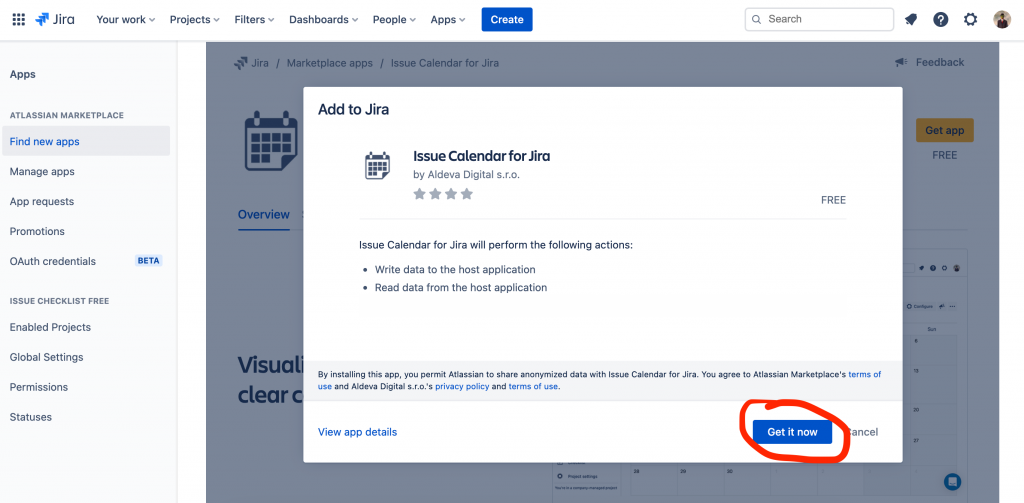
Once you have installed the plugin, you’ll be shown a confirmation screen inside your Jira instance to confirm that you want to install the plugin.
You’ll be informed about the required permissions the application is asking to grant, Privacy Policy and Terms of Service statements.
After you reviewed all of the above, continue by clicking the call to action button “Get it now“.
The installation may take up a few seconds, therefore you can take a break for a while, but be sure to get back! After the application is installed, you’ll see a notification informing you about the successful installation.

Now the hard part is over. You should see a message informing you about the successful installation.
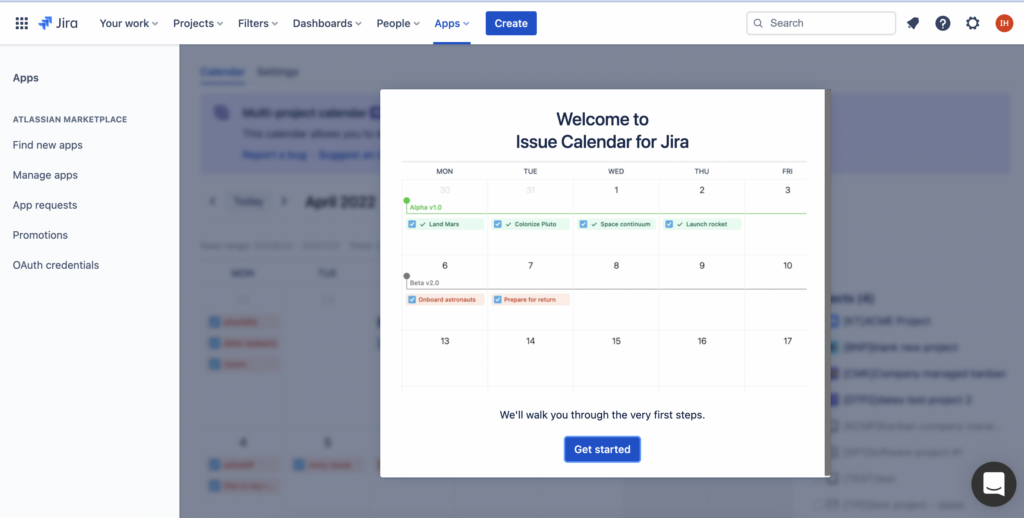
From here continue by clicking on the call to action button “Get started” to start setting up your first project.
3. Setting up the project calendar
You will be redirected to the welcome screen, from here continue by clicking “Get started” once more.
Now you’ll be asked to select the first project, where the calendar will be set up.
It can be either a test project of yours, or it can be a project you’re currently running.
After you selected a project, click “Continue“.

You will be redirected to the project screen.
This is the very last step to start using the calendar and is the most important one.

Click “Continue” and you’ll be shown a few option to have the project calendar completely set up.
Once you finish this step, you’re done and your calendar is configure.
You’ll configure the following settings:
- which field to use when placing the issues onto the calendar (“
duedate“) is the default and recommended setting - whether to show releases/versions on the calendar
Remember: each option can be tweaked later on, so you are encouraged to go with the default settings and just click “next”, “next” and “finish” 🙂 .
After you configure the settings you are ready to test your calendar.
Let’s test it!
Now that you’ve activated the app for the particular projects, let’s test it out.
Now open up one of the projects that you’ve activated the plugin for. Open Project Board to see, if you have at least a few issues with (“duedate“) available (it does not matter if the issues are TODO, IN PROGRESS or DONE columns).
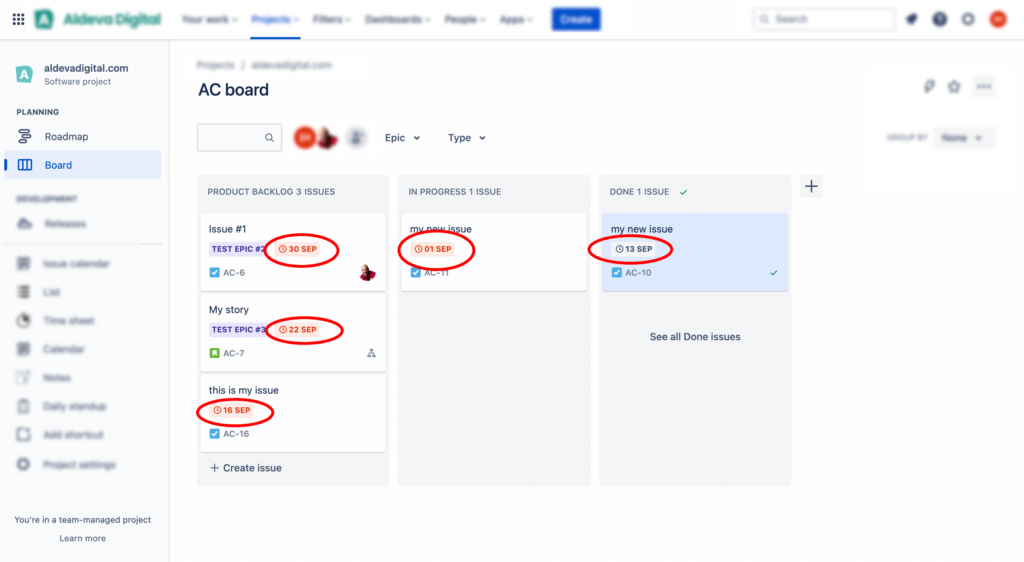
Now that you verified you do have a few issues on your kanban board, let’s switch to the new sidebar tab called Calendar.
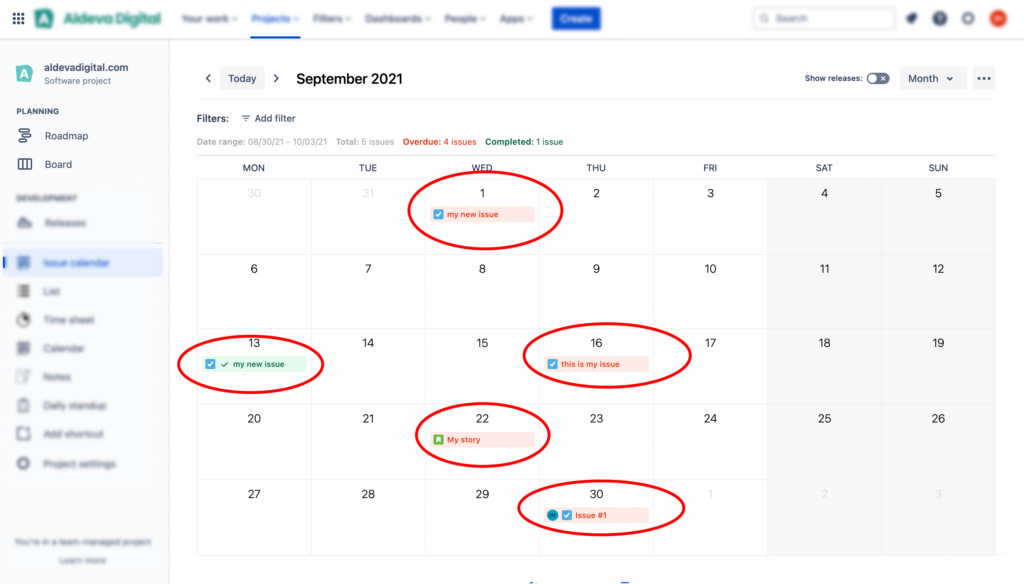
Once you open up the tab, you can see a clear calendar view with all of the issues from your kanban board.
The issues are coloured by their status color.
Conclusion
This guide show you how to get started with Issue Calendar for Jira.
The whole process of setting up the plugin is very easy and you can do it in no time. In case you need assistance with the setup, get in touch at support@aldevadigital.com.
