List view for Jira enables you to see the issues from back log in a list view.
This plugin extends the project interface with a new tab “List” that allows the list view.
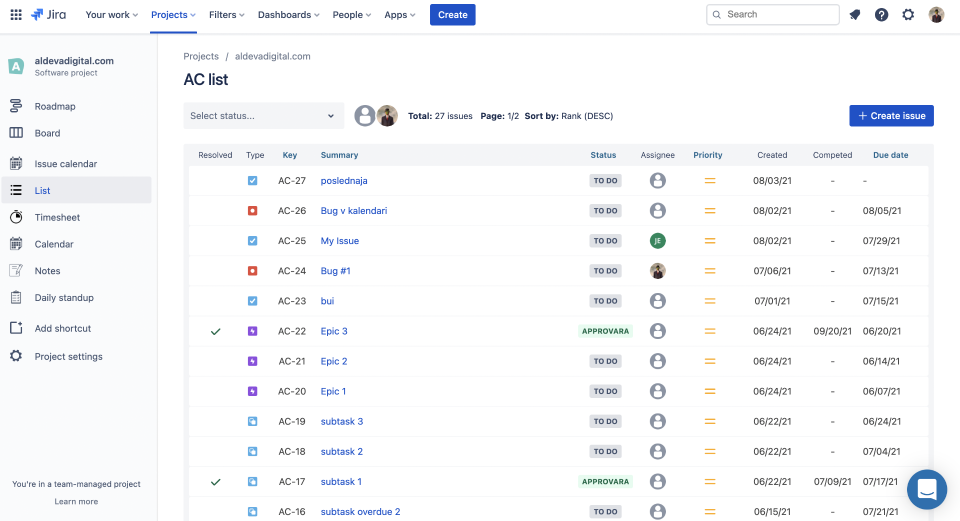
In this article you’ll learn how to start using the plugin.
Tutorial
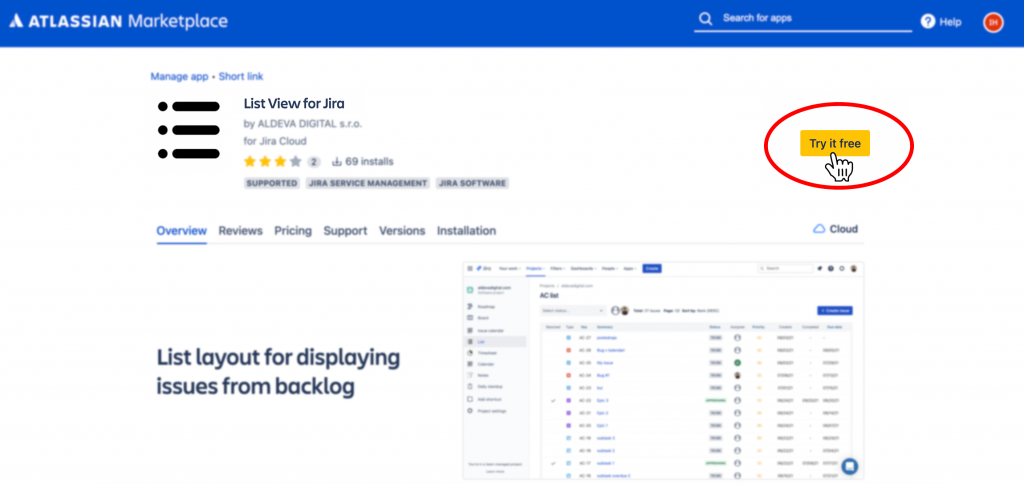
1. Visit Marketplace listing
The first step to using the addon is to install it from the Marketplace listing. To install the addon click “Try it Free“.
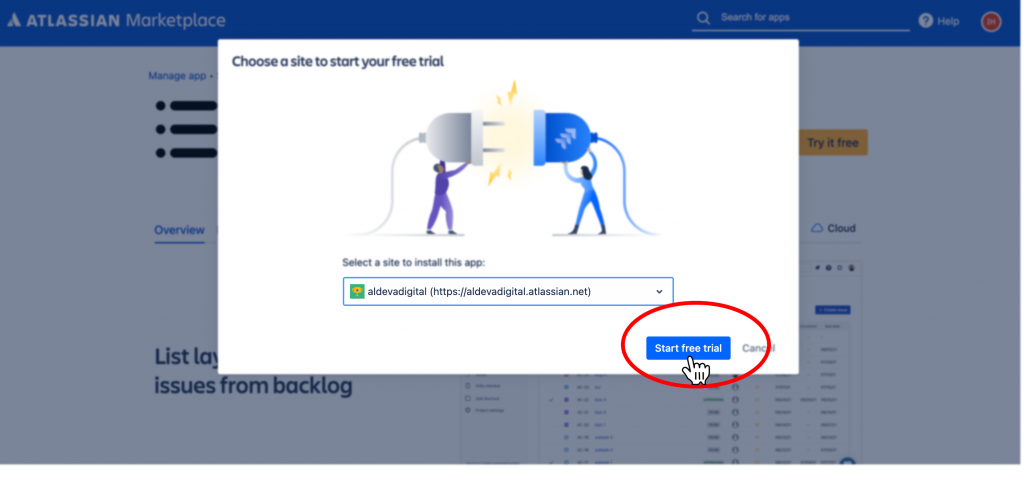
2. Choose a workspace to install
The installation process is going to ask you, inside which Jira instance you would like to install the plugin.
Select the right instance you want to try out the plugin and click “Start free trial“.
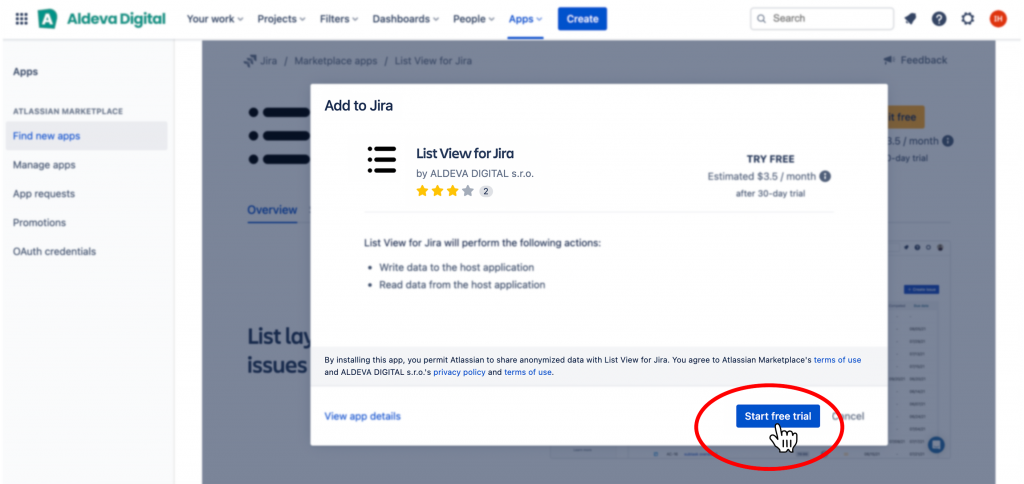
3. Confirm installation
Jira is going to ask you to confirm the installation of the addon. You can check out the plugin’s Terms of Service and Privacy Policy links.
Once you are ready to install click “Start free trial“.
4. Configure addon
Now it will take a couple of seconds till Jira installs the addon into your workspace. After the process is finished, you should see a notification in the upper-right corner.
Once you do, click Configure.
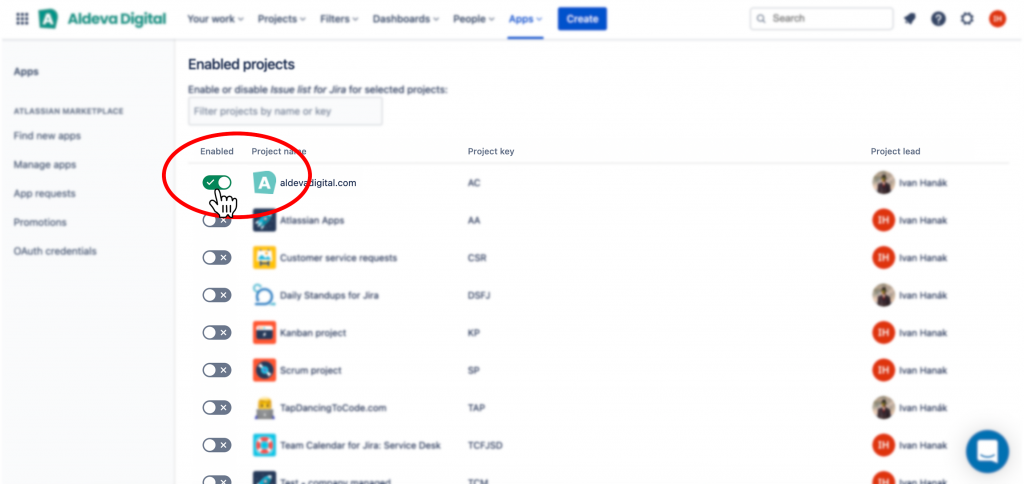
5. Enable addon for a project
Once on a Configuration screen, you should see a list of your Jira projects.
In order for you to use the List View for Jira with a particular project, you need to enable it here on the configuration screen.
You can enable the addon simply by turning the toggling button green.
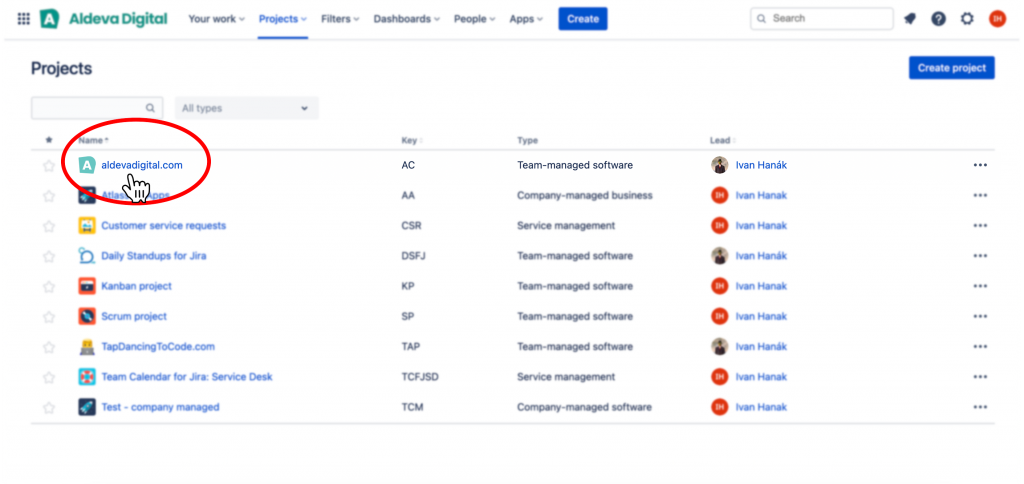
6. Open the project
Now that you’ve enabled the List View for Jira for you project, it’s time to test it out. Open up a list of your project and select the project, that you’ve enabled the addon for.
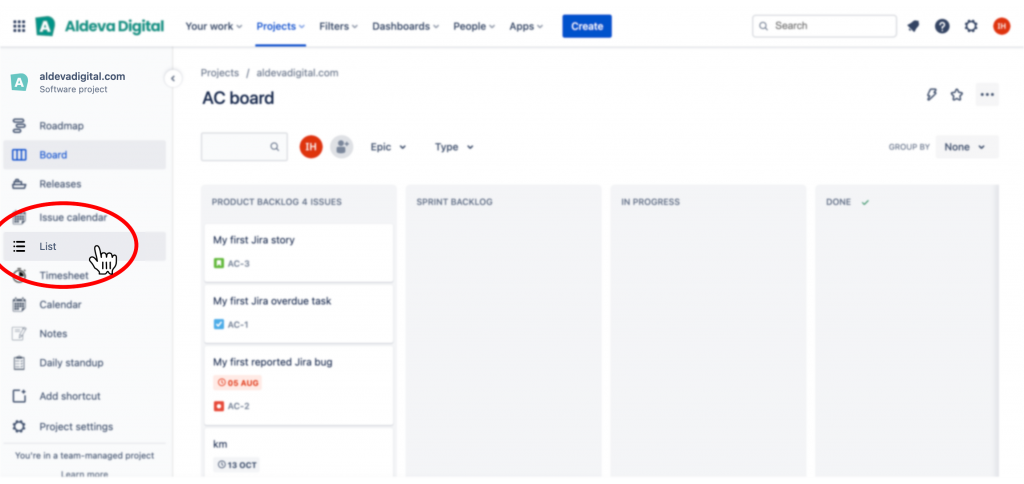
7. Find “List” tab on your project sidebar
Now when you have your project screen on the screen, you should see a new tab called “List” within your project sidebar. This is a place where the List View for Jira will reside. To see the plugin in action, click the “List” tab.
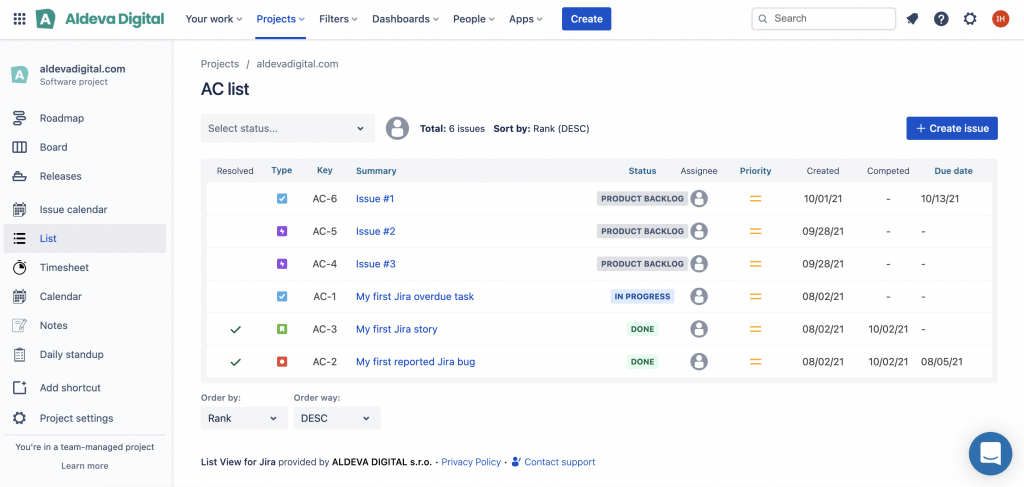
8. That’s it! 🎉
And that’s it. This is the List View for Jira in action.
You can see here all of your issues from the boards, you can use filtering, ordering and you can manage your tasks in a vertical fashion.
Conclusion
In this tutorial you learnt, how to get started with the addon List View for Jira.
If you need any additional assistance with setting up the plugin, please contact us at support@aldevadigital.com or use the live chat on the right bottom of the screen.
References:
